Blaze Premium: Best Built-In Hibachi Grill & DIY Home Build
The more you go to hibachi restaurants, the more you also want to imitate what the chef does.
And to add fuel to the temptation that’s already been building up, there are hundreds of thousands of blogs and websites that teach people how to cook these recipes too!
The only thing that stands in your way is building your own iron griddle kitchen tabletop, but you need the financial resources and the right info to push through with the plan.
You can either:
- hire a professional to install one into your kitchen
- get a good DIY kit and install the grill yourself
I installed a grill perfectly and you can do it as well. I finally chose this Blaze Premium 30-inch, which is the perfect size if you want to be able to put in some normal burners as well.
| Built-in Grill | Images |
|---|---|
| Best drop-in hibachi grill: Blaze Premium LTE | 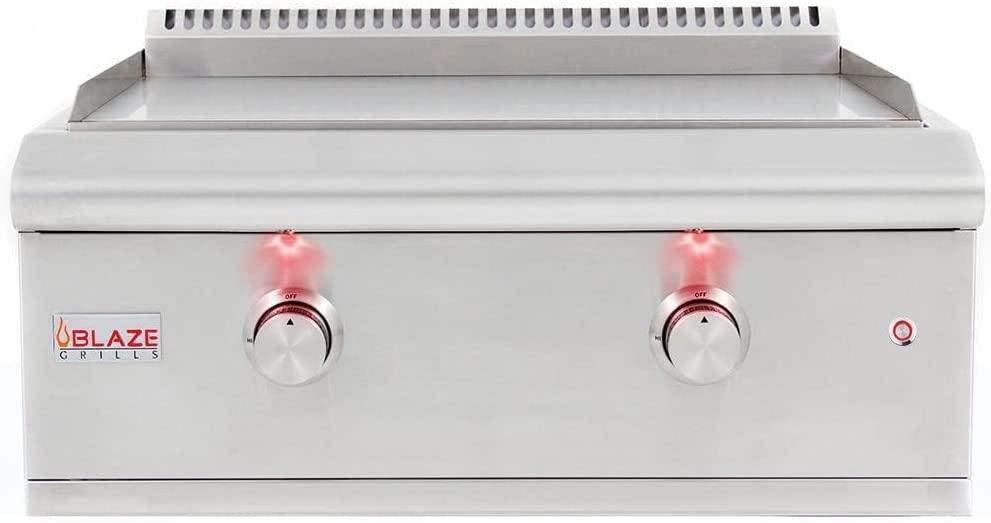 |
| Best range hood for ventilation: Broan-NuTone 403004 Range Hood Insert |
|
I just liked the space the Blaze offered my family to be able to cook a larger meal, and it still fits into my kitchen.
However, before you follow through with your plans to build your own teppanyaki hibachi grill, let us first determine what a hibachi grill is, what a hibachi is and what your options are.
Check out our new cookbook
Bitemybun's family recipes with complete meal planner and recipe guide.
Try it out for free with Kindle Unlimited:
Read for freeIn this post we'll cover:
Built-in hibachi buying guide
When it comes to choosing a good countertop, drop-in, or built-in griddle, it’s important to consider a few factors.
Installing a griddle is not as simple as it sounds and it requires a costly investment. So, make sure you pick the best option for your kitchen.
Type of utility (fuel)
Utility refers to the “fuel” type, mostly gas or electric.
Gas griddles
The griddle plate has feature burners. These elements heat the cooking surface when you light them up. Electric griddles are slower to heat up but they recover faster than gas.
Gas may be cheaper than electric depending on where you live.
Electric griddles
This type includes heating elements beneath or embedded in the griddle plate. These elements heat up when they are turned on.
Although electric griddles take longer to heat up and recover from than a gas one, they can be a great option for those places where gas isn’t an option.
An electric griddle may require a different exhaust system than a gas model, depending on the jurisdiction.
Griddle type
Next, decide where you want to put the griddle and how portable you’d like it to be.
Countertop
These units can be placed directly on a chef’s stand or equipment stand and can be moved around in a variety of places provided that power and ventilation are available.
They can be moved easily in the future and are very convenient to use. They have a control panel or button that’s turned right or left to turn up the heat (or turn it down).
Drop-in griddle
This kind of griddle is placed in a special cutout on the counter or the cooking table. Once installed, the cooktop is flat.
These griddles are a great choice for creating a flat, uniform look in the kitchen or around demonstration or front-of-house areas.
Teppanyaki
This Japanese griddle can be used in hibachi-style cooking. Because the heating elements are located in the middle of the unit, they differ from traditional drop-ins.
This allows food to cook in the center, and then be moved to the edges for heating at lower temperatures.
Size of the griddle
Griddles range in sizes from 12″ to 72″. Your home kitchen probably doesn’t require the largest one which is better for commercial kitchens.
There are a few things you should consider when selecting a unit:
Size of the hood
The size of your griddle should be proportional to the space that you have. To make sure it fits, add six inches to either side of your unit calculations.
If your griddle is attached or attached to other equipment, you should allow six inches between each end. A 36″ standalone griddle will require a 48-inch hood, for example.
You may want to buy a larger size if your establishment serves both breakfast and lunch on a griddle. This allows you to split the cooking zone into one zone for delicate items and the other for heavier meats and frozen foods.
With seafood and many Japanese dishes, you really need to think about space for foods that require different cooking temperatures.
Griddle temperature controls
Manual
Cheaper griddles only offer manual controls which just means you have an on and off button and three heat settings.
The problem with this is that you don’t have those specific temperature settings you want for precise cooking. You just get the usual low, medium, high.
However, this still makes them well suited for griddles that will be used to make lunch items like burgers, bacon, cheesesteaks, and other meats.
Thermostatic
Thermostatic controls are great because they allow you to set a temperature precisely. This is ideal when cooking delicate or breakfast foods such as eggs and hotcakes.
If you plan to use your griddle as an oven plate or for keeping other foods warm, thermostat controls can be a great choice.
The thickness of the griddle plate
There are three general types of plates:
- The standard-duty: 1/2″ thick griddle plate is ideal for cooking breakfast which needs a thinner plate.
- The medium duty: 3/4″ thick griddle plate
- The heavy-duty: 1″ thick plate which is better for cooking frozen foods like patties and frozen meat.
Plate material should be made of steel, as it’s the best heavy-duty material for this purpose.
Learn more about Teppanyaki & how to cook it at home (+recipe, cookbooks & ingredients) here
The Hibachi
The hibachi (火鉢) which is translated as “fire bowl” is a traditional Japanese furnace for heating charcoal.
It is made of a round or sometimes square, lined with heat-proofed material, container, and made durable enough to be able to withstand the high temperatures of burning charcoal.
What we’re actually going for here is a teppanyaki grill plate, it’s the kind of flat top griddle they cook on at hibachi restaurants.
If you’d like to know exactly how hot a hibachi grill can get, you should check out the link to my article I’ve written on just that topic alone.
You can install one in one of two ways:
- option 1: purchase a teppanyaki grill from a supplier and have it installed in your kitchen
- option 2: do it yourself from scratch.
Outdoor vs indoor built-in teppanyaki grills
The good news is that both an indoor and outdoor built-in teppanyaki grill works the same way. There’s no real difference but you can avoid the smell of cooking if you choose to do it outdoors.
An indoor teppanyaki grill is a flat smooth surface griddle. The outdoor teppanyaki grill is called a teppanyaki table.
The outside part of a teppanyaki grill table’s center part is a wide ring (about 3.5 inches). This maintains the cooked food warm. Then, the outside area is cold and stays cold as you’re not meant to cook on it.
Thus with the outdoor teppan, you have space on the table for food prep.
The outdoor teppanyaki is a perfect way to upgrade your outdoor kitchen design. It’s also a fun way to practice social cooking with friends and family.
Unlike with traditional outdoor grills, everyone can partake in the cooking and even cook their own food if you don’t feel like cooking every single item on your menu.
Basically both the indoor and outdoor teppanyaki grills are similar to cooking on a gas grill or electric cooker but you can make more foods.
I’m sure not a lot of you make breakfast on the traditional outdoor grill or smoker. But, with a teppan, you can totally do that inside or outside!
Best drop-in hibachi grill reviewed: Blaze Premium LTE
So, you need a commercial-grade hibachi or “teppanyaki” flat surface griddle. What can you buy for a reasonable price?
One of the best affordable options is the Blaze Grills Premium LTE 30-inch.
It is the kind of commercial griddle that you can use to cook for your family or customers.
You can use it for cooking at temperatures up to 300 degrees C. Therefore it’s ideal for making all kinds of Japanese recipes, whether it be okonomiyaki pancakes, omelets, stir-fries, hibachi-style noodles and even the beloved Teriyaki chicken.
Since the surface is non-stick, you can use the spatulas to flip, scrape, and roll.
The griddle has a control panel, non-slip rubber feet a special hole for oil leakage, and an oil receiving box.
How to install a built-in hibachi grill
Have a Teppanyaki Iron Griddle Installed in Your Kitchen (Option 1)
With this option you won’t have to worry about doing all the heavy lifting as a professional installation team/company like Houzz will take care of all the planning and execution of the project.
Although they may need to coordinate with you on the specifics of the design (i.e. where the teppanyaki grill should be located, grill design ideas, etc.).
You’ll only need to be prepared to subsidize the project, but don’t worry about whether or not you can afford it because these companies usually give you a quote of the price for the installation job.
Step 1: Research for Good Teppanyaki Hibachi Grills Online
There are not a lot of suppliers or manufacturers that sell a teppanyaki hibachi combo grill, so for this one, you may have to ask them to do it custom-made for you, which may cost more than the standard installation jobs they offer.
A built-in teppanyaki iron griddle on your kitchen countertop is both impressive and very practical as it will allow you to cook multiple dishes at the same time, of course, you’ll need an extra hand to actually accomplish this.
A person can only do so much with his/her two hands.
Find a manufacturer who will agree to build you a custom-made teppanyaki hibachi grill and hire the one that will offer the lowest price for good quality work.
Step 2: Contact Supplier
Contact at least 10 suppliers or manufacturers and make a list of the questions you want to ask them.
Check out their background, previous work, customer satisfaction, work quality, and pricing.
Once you have all the information you need from them, then you may narrow down your choices by comparing their services.
Hire the best company that will meet all your demands for a reasonable price.
Step 3: Consultations and Quotes
You may try calling their customer relations department to talk about the custom-built teppanyaki hibachi iron griddle, but you can also make an appointment to meet with one of their representatives, so you can make an in-depth discussion with them about your ideas.
After that get a price quote for the item that you want them to install in your kitchen. It’s common sense to go for the cheapest services that a company offers; however, you need to balance the quality of work done also.
If it will not hurt to spend a few extra bucks for the high-quality teppanyaki grill that you want, then it should be alright to spend some money on something good.
Step 4: Make the Purchase
Once you’ve made a decision, then check your bank account and wire the payment to the supplier and complete your purchase.
They should then give you a few days notice before they’ll start the installation process.
You’ll also need to be present on the scheduled date of the installation, or leave a representative in your house to welcome the installation team.
Step 5: Installation
There’s pretty much very little for you to do during the installation of your custom-built teppanyaki hibachi grill, and all you have to do is guide the installation team around your house, show them where the kitchen is and entertain them a little bit with some small talk.
They should be super professional in their work, so you can expect them to finish up sooner than the number of hours they’ve initially declared, and they’ll do the job discreetly so as not to disturb your daily routine.
Once done, they should show you how the grill works by doing a few tests, and then afterward they’ll leave thank you for your hospitality.
DIY Teppanyaki Hibachi Grill for Your Kitchen (Option 2)
This option is much harder than the first one, or maybe better depending on how you look at it.
On the one hand building, things from scratch take a lot more time, effort, and resources, while on the other you’ll get to build your own teppanyaki hibachi grill right down to the minute details, which gives it some sentimental value too.
The whole idea of a do-it-yourself (DIY) project such as this one is to cut down on the total cost of buying or having a custom-made teppanyaki hibachi grill from a certain manufacturer or company.
So let us check and see if that can be achieved in your situation.
So, getting ready to install the Blaze (check prices and availability here).
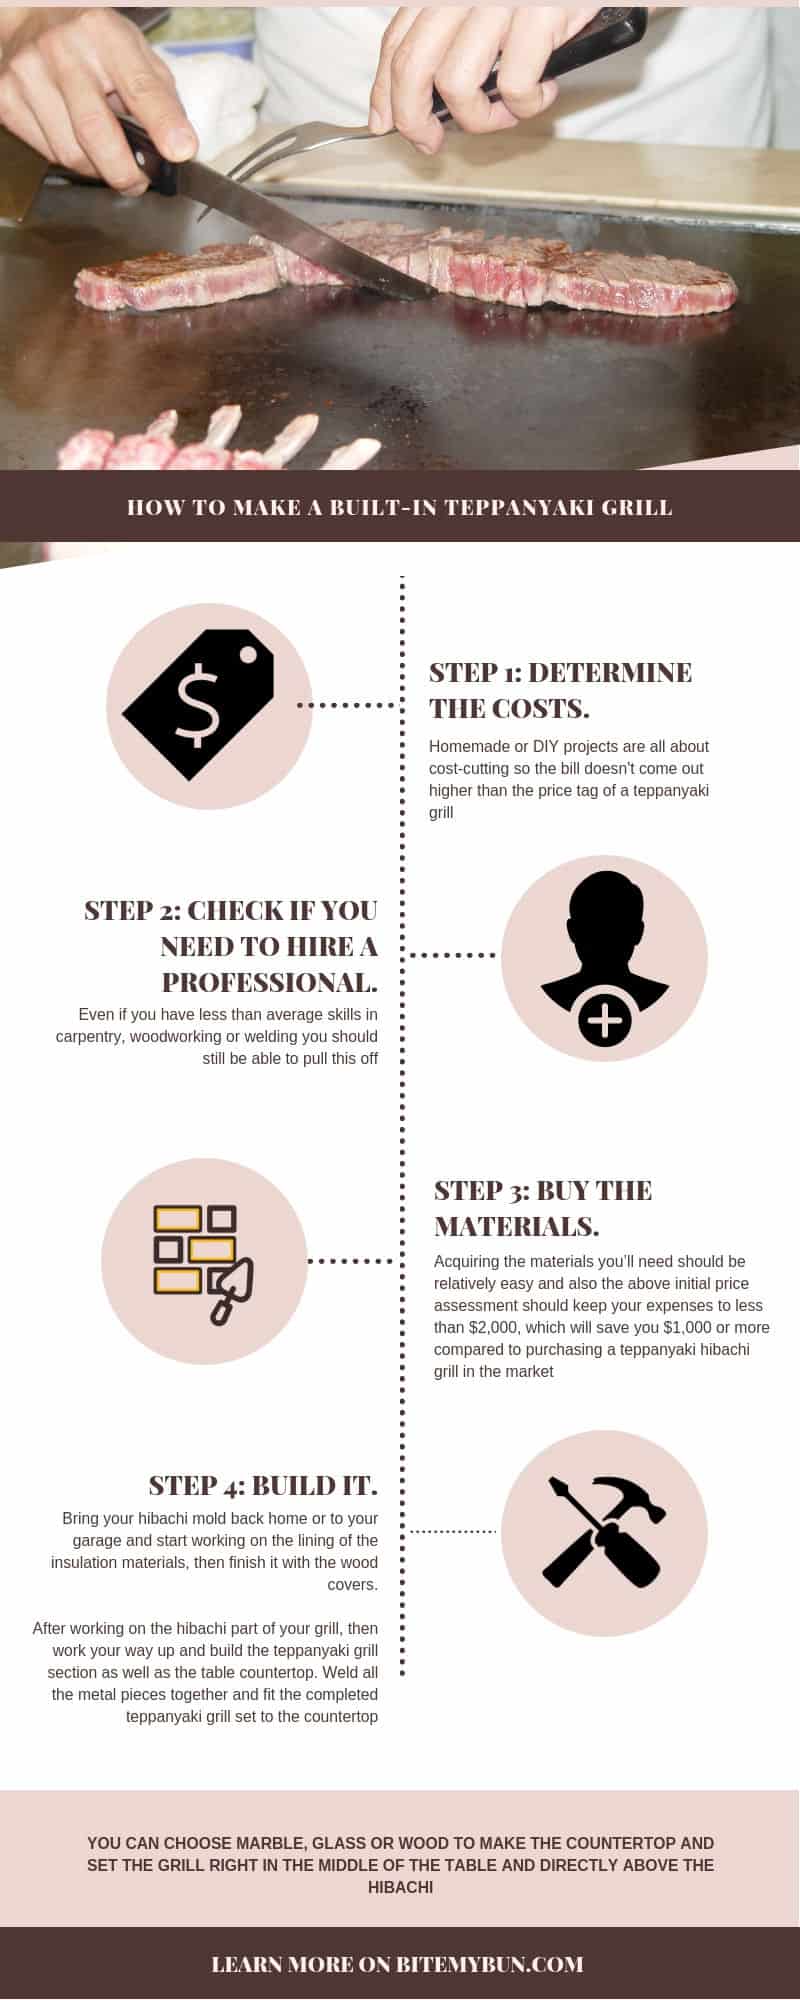
This is an infographic using as the top image the original work 20031015_Bachmann@Teppanyaki_3547 by Ray Swi-hymn on Flickr under cc. A mouth-watering piece of meat on a built-in Teppanyaki plate.
Step 1: Determine the Costs
Homemade or DIY projects are all about cost-cutting and if the bill comes out higher than the projected estimates or the price tag of a teppanyaki grill in the market, then it isn’t even worth risking your money for.
You’ll be better off just scrapping the whole thing, but I think using a hibachi to fire up your teppanyaki grill should cost less to build than to buy one.
A teppanyaki iron griddle (the ones that are gas-fed not by charcoal in a hibachi) costs between $700 – $3,000 or higher.
The Garland is huge! This is the kind of teppanyaki hibachi grill that you’ll want to build for yourself and with the right tools and materials, you can absolutely build something like it.
A flat stainless steel or cast iron about 400mm x 300mm and 0.5mm thick cost around $10, while stainless steel rods for support 0.125-inch x 12-inch cost $5 apiece, and a small oiled or black painted erw welded square and rectangle steel tube for support frame 10 x 10mm-600 x 600mm cost $15 – $20 each.
If you have your own welding tools and other tools needed for the job, then that’s good, or you can just rent them too as an alternate option.
You’ll most probably need only 1 – 5 pieces of each of the items mentioned as you’re only building one teppanyaki hibachi grill, so you’ll not spend that much on these materials.
The hibachi part of this contraption will be made out of the melted diatomaceous earth, insulating materials, and wood coverings on the external part.
Remember to list down the specifications and dimensions of the teppanyaki hibachi grill you want for your kitchen, so it will only occupy an ideal space there.
Step 2: Check to See if You Need to Hire a Professional, or You Can Do it on Your Own
Okay, since we’ve covered enough about the materials costs, it’s time to see if you’ve got the skills to do some “dirty” work.
It’s not the dirty metaphor, but the literal dirty work of welding all of the pieces of this thing together, because you will get dirt on your hands and probably other parts of your body.
However, it shouldn’t be anything that a mechanic overall can’t handle. But even if you have less than average skills in carpentry, woodworking, or welding you should still be able to pull this off.
There are a lot of YouTube videos that will walk you through building anything and it will even make you look like a professional yourself, even though this is the first time you’ve done something like this.
Of course, your determination is only as good as your faith in own yourself, so if you really feel that you can’t do it, then just hire a professional to do it for you.
Still, it wouldn’t be as fulfilling as when you’ll do it yourself and you’ll miss all the fun in learning new things that you’ve never learned before.
Step 3: Buy the Materials/Hire a Professional
So far we’ve already determined the specific design for your built-in teppanyaki hibachi grill and the materials cost and other important information about this DIY project.
And now you may go ahead and decide to purchase the materials or hire a professional (as a secondary option) in case you’re not interested in doing the hard labor yourself.
Acquiring the materials you’ll need should be relatively easy and also the above initial price assessment should keep your expenses to less than $2,000, which will save you $1,000 or more compared to purchasing a teppanyaki hibachi grill in the market.
Step 4: Build it
Now that you have the materials needed to build your own teppanyaki hibachi grill, then it’s time to start the project. You may refer to this video and hundreds of other DIY videos on YouTube about homemade teppanyaki hibachi grills:
So what you’ll need to do first is to start building the hibachi part of the grill and you may want to rent a kiln in order to have your hibachi molded.
There should be a time-sharing kiln near you and all you have to do is contact them and set a schedule for you to mold the melted diatomaceous earth into a square box or cylindrical design.
Once you’re done, bring your hibachi mold back home or to your garage and start working on the lining of the insulation materials, then finish it with the wood covers.
After working on the hibachi part of your grill, then work your way up and build the teppanyaki grill section as well as the table countertop.
Weld all the metal pieces together and fit the completed teppanyaki grill set to the countertop.
You can choose marble, glass, or wood to make the countertop and set the grill right in the middle of the table and directly above the hibachi.
Make sure that you’ve placed a door on one side of the hibachi or design the grill to come off so you can fill the inner section of the hibachi with coal.
With all the components set in place, you should be able to finish your homemade teppanyaki hibachi grill in at least two weeks’ time.
Step 5: Test it for Efficiency and Safety
Since you build this grill by yourself and you’re not accredited by any authority on grill and fire safety, it may be best to consult with your local fire department as well as a teppanyaki hibachi supplier, so they can make an assessment of it.
Invite them over to your house and prepare something for them to eat – this will be the perfect opportunity for you to use the teppanyaki hibachi grill and test it for safety and efficiency at the same time.
Technically, since the whole cooktop has very basic elements to it, you don’t really have to worry about safety as it’s just a simple design grill.
Gas-fed grills are the ones that need a lot of safety checks and drills.
Step 6: Study the Maintenance and Repair
It doesn’t take a genius to figure out how to fix your own teppanyaki hibachi grill, especially since you’re the one who built it.
But just to make sure that you’ll be able to retrace your steps in the future, you may want to film yourself while building it, so you’ll know which parts go where.
This article about cleaning and maintenance of the teppanyaki grill should come in handy each time you use it.
Installing vents & a range hood for hibachi cooking
Proper ventilation is necessary for the safe operation of your griddle.
Therefore, you need to install vents to allow for airflow.
The best way to remove any smoke is with the help of a range hood. Usually, you can install these right into the furniture under the top cabinet above the griddle.
Here’s a great affordable range hood:
Best range hood for ventilation: Broan-NuTone 403004 Range Hood Insert
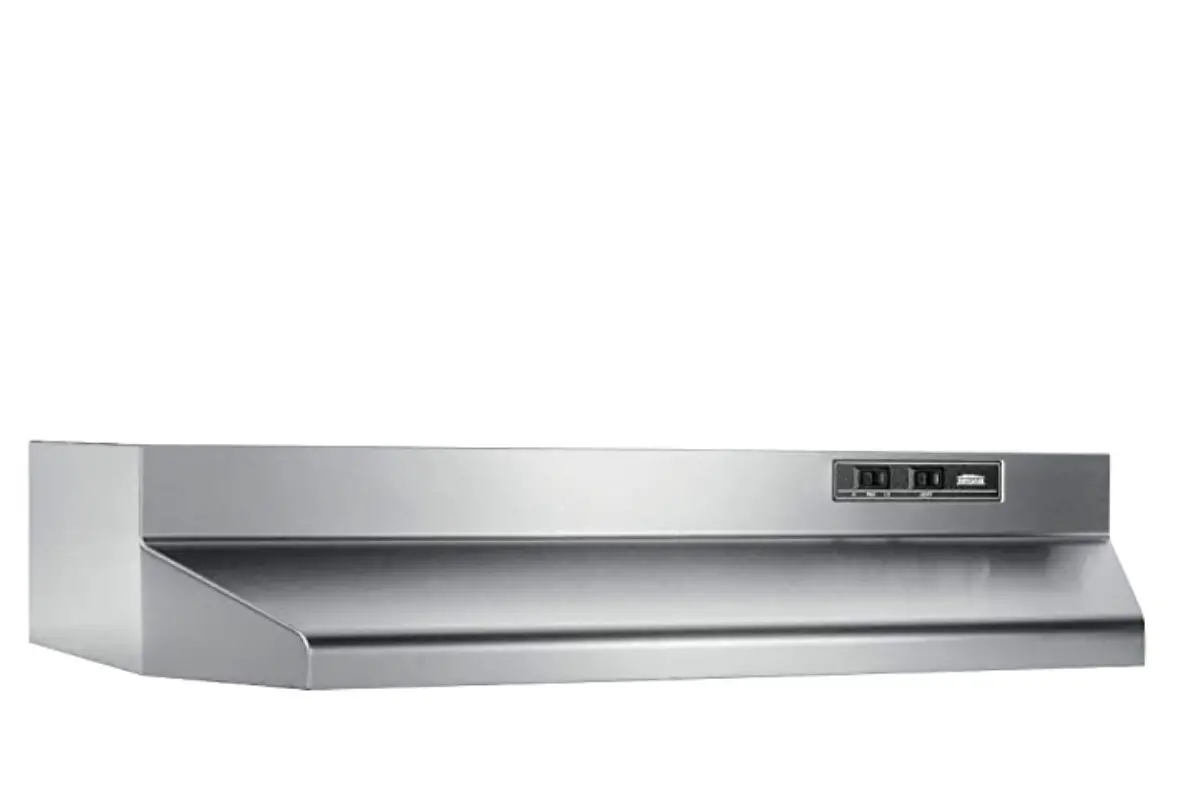
You should never use a teppanyaki, hibachi, or other griddle or grill indoors without a range hood that offers ventilation. It also removes the smoke so your smoke alarm doesn’t go off as you’re cooking your favorite food.
This stainless steel range hood matches the griddles so it looks beautiful in your home. But, it’s also very affordable and pretty easy to install.
It not only improves the ventilation but it gives extra lighting so you can see exactly what you’re cooking on the hot plate.
How to install range hood
Check out this helpful installation video:
You don’t need many tools, but these are the ones to use:
- Non-contact circuit tester
- Power drill
- Duct tape
- Level
- Drill bits
- Wire stripper
- Wire nuts
- Screwdriver
Step 1
First, turn off the circuit breaker to stop the power in that area.
Step 2
Find the ductwork and make sure the new range hood is compatible.
Under-cabinet range hoods have ductwork that runs upwards through the cabinets before connecting to the outside. However, some ductwork will run back through the wall.
Make sure you know what type of ductwork your existing range hood can connect to.
Step 3
You will need to make a hole in your wall and possibly the cabinets to allow the ductwork to pass through if you are installing a new ducted range-hood.
The specific range of hoods you are installing will dictate the exact location and method. Follow the instructions in the package to determine where the hole should go.
Mark the point with a pencil and use a level to locate the center of your wall space. The template should be placed over the spot. Next, drill the cutout. You can now drill the locations for the electrical wiring unless you hire an electrician to do the job.
After drilling or cutting your vent hole, you should check for any pipes or studs behind the drywall. You will need to reroute any obstacles that may be in the space.
Depending on your level of skill and confidence, you might consider hiring a general contractor to do this part.
Once all obstacles have been cleared, you can install the ductwork outside in the most efficient way possible. Use duct tape to seal joints.
Step 4
Now it’s finally time to place the hood up.
A majority of hoods come with a template that shows you the locations for mounting screws.
To avoid damage to the tile or wall, make small holes in your wall before mounting.
Mounting cabinets to range hoods require that they be strong enough to hold the screws in place. You may need to use reinforcing blocks to insert your screws if the cabinets are very thin. You can find these at hardware stores.
To drill holes for screws, use the correct size drill bit. Replace the drill bit with a screw tip, and then drill the screws.
After the screws have been inserted, verify that the vent hole is aligned. Adjust as needed.
Place the hood and connect the wires. The wires will power the fan and the light of the hood. There will also be a grounding wire that connects to its grounding screw. It is easy to connect the wires: first, connect the black wires of the hood to those in the wall.
Next, connect the white wires. If you are unsure about electrical work, an electrician can help you.
Step 5
A ductless hood makes the installation of an under-cabinet rangehood much simpler.
Installing a ductless range hood requires that you use a level to locate the center of your wall space. Then, mark it with a pencil.
To mark the screws, use the template provided. If there is no template, someone can hold the range hood while you mark the holes. Then, set it aside.
Step 6
To drill holes for screws and wires, use a drill bit that is the right size. If you mount thin cabinets to your ducted range hood, you can add reinforcement blocks to the screws. Also, be careful not to damage tiles when mounting to a tiled wall.
Mount the range hood using the mounting screws. Then, feed the wiring through the back of the hood. The wire nuts are used to connect the wiring to the range hood.
Match the colors and then attach the grounding wire from the wall to the grounding screw.
Using a grill-top griddle
Ok, I’m not going to say it’s the third option, but you can “improvise” and make your own teppanyaki griddle by using a grill-top griddle plate on top of any grill or stovetop.
This can be a good option for small kitchens or if you want to use a flat surface griddle when cooking outdoors without committing to a built-in one.
The best option is the Sizzle-Q SQ180 100% Stainless Steel Universal Griddle.
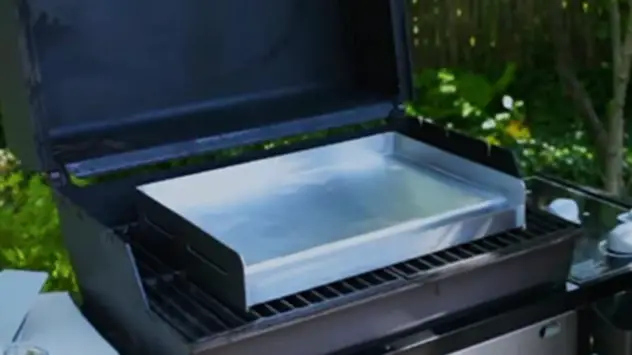
It’s a great stainless steel smooth surface teppan griddle. So, when you want to cook food on it, you heat up your electric, propane, or charcoal grill and then put this griddle on top of it.
The griddle doesn’t contain a heat source, it just goes on top of an existing heat source. However, it’s designed with vents to allow proper airflow so you get amazing, well-cooked dishes.
The 14-gauge stainless steel is very durable and sturdy so it can withstand high temperatures without warping.
It also has a small built-in grease drip tray to collect all the fat so it doesn’t get your cooktop or grill dirty.
Overall, this is an excellent option if you don’t have space or the budget for the built-in teppanyaki grill or hibachi. You’ll get similar cooking results and now you can make tasty okonomiyaki on the flat griddle after you cook some tasty ribs on the grill.
Conclusion
You can definitely do it yourself, although hiring an expert might yield the best results, depending on your skill. I don’t build in appliances often and was able to pull it off though, so it should be very doable.
You can always opt for a more affordable tabletop grill if you’re just getting started in Teppanyaki or don’t have space in your kitchen.
Or, if you still want to go the kitchen route and have a stove to cook on, you can go for a teppanyaki stove top plate to use in your home.
Check out our new cookbook
Bitemybun's family recipes with complete meal planner and recipe guide.
Try it out for free with Kindle Unlimited:
Read for free
Joost Nusselder, the founder of Bite My Bun is a content marketer, dad and loves trying out new food with Japanese food at the heart of his passion, and together with his team he's been creating in-depth blog articles since 2016 to help loyal readers with recipes and cooking tips.