Roast Like a Pro: Tips for Setting the Right Oven Temperature
Roasting is a cooking method that uses dry heat, whether an open flame, oven, or other heat source. Roasting can enhance flavor through caramelization and Maillard browning on the surface of the food.
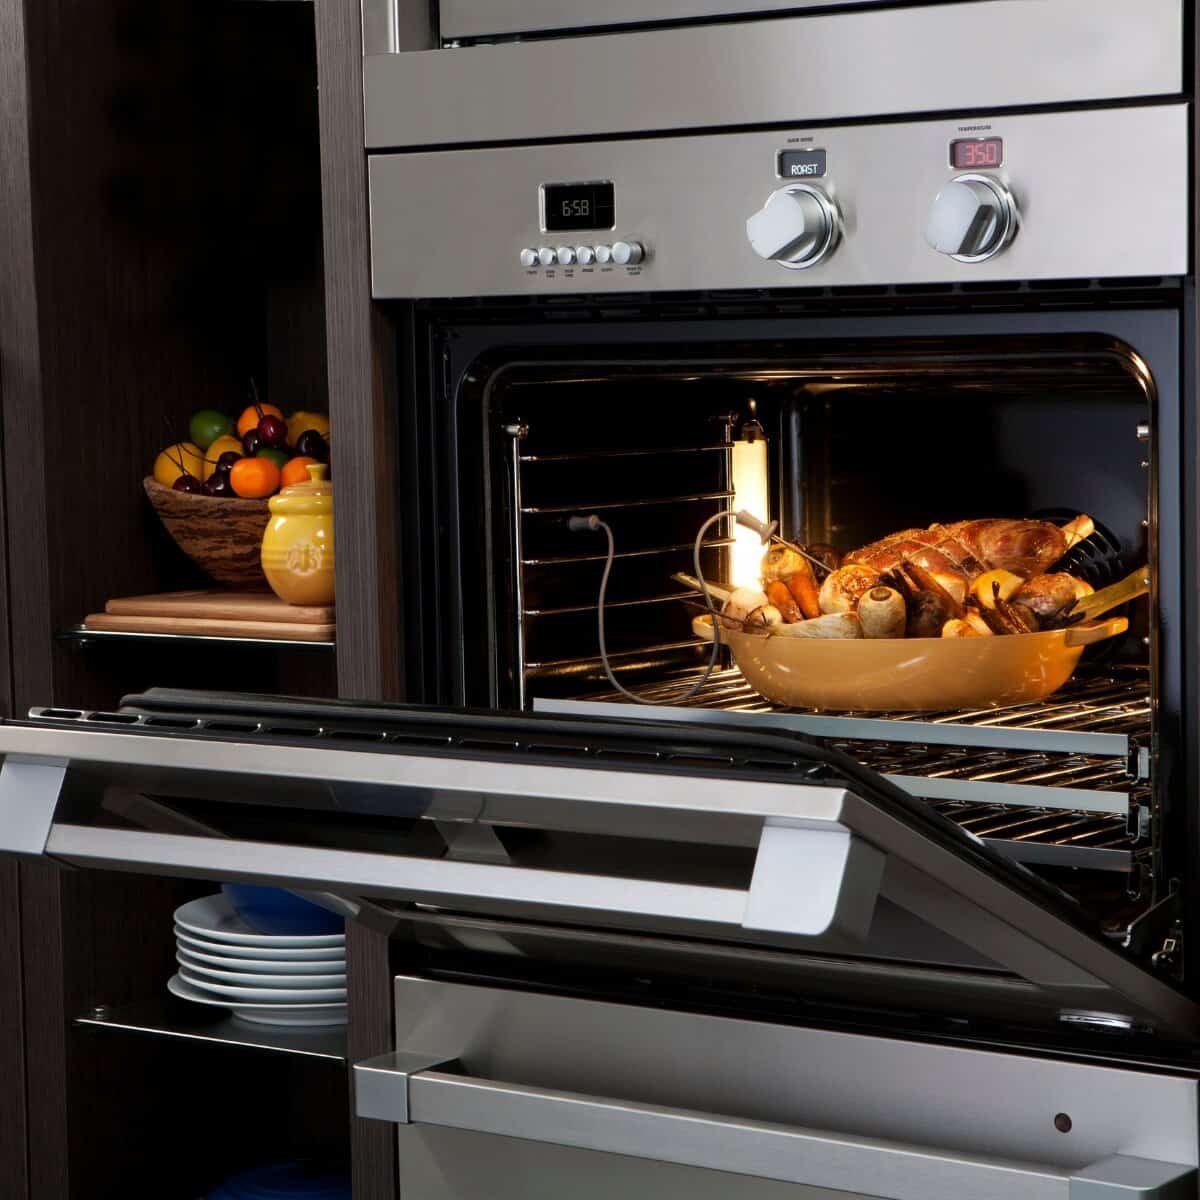
Roasting uses indirect, diffused heat (as in an oven), and is suitable for slower cooking of meat in a larger, whole piece.
The secret to perfect roasting is to use a hot oven, a wire rack to keep the meat above the pan’s juices, and to baste the meat frequently with the juices. The right temperature and seasoning are also important.
In this article, I’ll share all the tips and tricks to make sure you get it right every time.
Check out our new cookbook
Bitemybun's family recipes with complete meal planner and recipe guide.
Try it out for free with Kindle Unlimited:
Read for freeIn this post we'll cover:
Roasting: A Method for Cooking Meat to Perfection
Roasting is a cooking method that uses dry heat to cook meat, poultry, and vegetables. It typically involves placing the food on a large, heavy pan or rack and setting it in a hot oven. The high heat produces a burst of browning on the surface of the food, which helps to achieve the desired texture and flavor. Roasting is a common method for cooking large cuts of beef, pork, and poultry, as well as vegetables like carrots, okra, green beans, corn, brussel sprouts, and potatoes (scalloped potatoes are a personal favorite).
Why Roasting is a Superior Method for Cooking Meat
Roasting is a superior method for cooking meat because it produces a drier, more solid structure that is easier to slice and serve. The higher heat also helps to produce a nice browning on the surface of the meat, which adds flavor and texture. Roasting is particularly helpful for fatty cuts of meat, as the heat helps to melt away some of the fat and produce a delicious, crispy exterior.
The Essential Tools You Need for Roasting
To roast meat successfully, you’ll need a few key tools, including:
- A heavy roasting pan or rack
- Twine for trussing the meat (ask your butcher for help if you’re not sure how to do this)
- A wire rack to elevate the meat off the surface of the pan and allow air to circulate around it
- A meat thermometer to ensure that the meat is cooked to the desired temperature
How to Roast Meat to Perfection
Roasting meat can be tricky, as different cuts of meat require different cooking times and temperatures. Here are some general tips to help you achieve the perfect roast:
- Preheat your oven to the desired temperature before beginning to cook.
- Season the meat with salt and pepper, and any other herbs or spices you like.
- Place the meat on a wire rack in a roasting pan, with the fatty side up if applicable.
- Cook the meat for a short period of time at a high temperature (around 450°F) to achieve a nice browning on the surface.
- Lower the temperature to around 350°F and continue cooking until the meat reaches the desired internal temperature (use a meat thermometer to check).
- Let the meat rest for a few minutes before slicing and serving.
Roasting Poultry: Tips and Tricks
Roasting poultry (like turkey or chicken) can be a bit more challenging than roasting beef or pork, as the breast meat tends to cook faster than the leg meat. Here are some tips to help you achieve a juicy, evenly cooked bird:
- Truss the bird to help it maintain its shape and cook more evenly.
- Cook the bird breast-side down for the first hour of cooking to help the juices flow into the breast meat.
- Baste the bird frequently with its own drippings to keep it moist.
- If the breast meat is cooking too quickly, cover it with foil to prevent it from overcooking.
- Let the bird rest for at least 15 minutes before carving to allow the juices to redistribute.
Roasting Vegetables: A Delicious Side Dish
Roasting vegetables is a delicious and easy way to serve up a side dish that’s packed with flavor. Here are some tips for roasting vegetables to perfection:
- Cut the vegetables into even-sized pieces to ensure that they cook evenly.
- Toss the vegetables with a bit of oil and seasoning (salt, pepper, and garlic are always a good choice).
- Spread the vegetables out on a baking sheet in a single layer.
- Roast the vegetables at a high temperature (around 425°F) for 20-30 minutes, or until they are tender and browned.
- Serve the roasted vegetables hot as a side dish to your favorite roasted meats.
Don’t Burn Your Dishes: A Guide to Setting the Right Oven Temperature
When it comes to cooking, setting the oven temperature properly means the difference between a perfectly cooked dish and a burnt one. Here are some reasons why it’s important to set the right oven temperature:
- Cooking meat at the ideal temperature ensures it’s safe to eat and tastes delicious.
- Baked goods require a specific temperature to rise properly and cook evenly.
- Some recipes require a slow and low heat, while others need a high heat to cook quickly.
- Setting the oven temperature too high can cause the food to burn, while setting it too low can result in undercooked food.
How to Choose the Right Temperature
Choosing the right temperature for your dish can be a simple process if you follow these steps:
1. Check the recipe: Most recipes will provide an ideal oven temperature for the dish you’re cooking. Make sure to follow it closely.
2. Consider the type of dish: Different dishes require different temperatures. For example, baked goods usually require a temperature between 325°F to 375°F, while meat can be cooked at a higher temperature of 400°F to 450°F.
3. Know your oven: Every oven is different, so it’s important to know how your oven heats up. Some ovens may run hotter or cooler than others, so it’s always a good idea to check the temperature with an oven thermometer.
The Difference Between Baking and Roasting
Baking and roasting are two different cooking methods that require different oven temperatures:
- Baking: Baking is a dry heat cooking method that requires a lower temperature of around 325°F to 375°F. It’s used for baked goods like cakes, cookies, and bread.
- Roasting: Roasting is a dry heat cooking method that requires a higher temperature of around 400°F to 450°F. It’s used for meat, poultry, and vegetables.
Equip Yourself with the Right Tools for Perfectly Roasted Meats
A sturdy and heavy roasting pan and rack are essential for evenly cooking large cuts of meat. Choose a pan that is large enough to hold the meat comfortably and has high sides to prevent spills. A rack is helpful as it allows the heat to circulate around the meat and distribute the drippings evenly. A wire rack is a good option as it suspends the meat, allowing the heat to contact all sides, and prevents the meat from burning.
Truss and Tie Your Meat Carefully
Trussing and tying your meat is a key step in roasting as it helps the meat hold its shape and cook evenly. Ask your butcher for twine if you don’t have any at home. Trussing is especially important for poultry as it helps the bird cook evenly and hold its shape.
Use a Meat Thermometer to Avoid Overcooking
A meat thermometer is an essential tool for foolproof roasting. It allows you to monitor the internal temperature of the meat and avoid overcooking. A remote digital thermometer is a helpful investment as it allows you to monitor the temperature without opening the oven door and losing heat.
Allow Your Meat to Rest and Cool
After roasting, it’s important to let the meat rest for a few minutes before carving. This allows the juices to redistribute and ensures that the meat is juicy and tender. Place the meat on a cooling rack or a cutting board and cover it with foil to keep it warm.
Choose the Right Cookware and Hardware
When roasting, it’s important to use cookware and hardware that can withstand high heat. A heavy-duty roaster or Dutch oven is a good option for roasting meats. Make sure to use sturdy oven mitts or potholders to protect your hands from the hot pan and rack.
Basting: To Do or Not To Do?
When it comes to roasting, basting is a common technique used to add moisture and flavor to the meat. However, contrary to popular belief, basting isn’t always necessary. Here’s why:
- Basting requires time and effort: Basting involves opening the oven door, removing the meat, and spooning or brushing the fat or liquid over the meat. This process takes time and requires a bit of precision to avoid overcooking or undercooking the meat. If you’re short on time or simply don’t want to bother with the process, skipping basting is perfectly fine.
- It depends on the meat: Some cuts of meat, like pork, tend to dry out quickly and benefit from basting. However, other cuts, like a nice beef roast or turkey, have enough fat content to prevent them from drying out. If you prefer a drier meat, skipping basting is a good way to achieve that.
- It may not make a significant difference: While basting can improve the flavor and moisture of the meat, the resulting difference may not be significant enough to warrant the extra effort. If you’re making a dish with plenty of other flavors and ingredients, the impact of basting may not be noticeable.
When Basting is Worth Considering
Of course, there are certain situations where basting is important and can make a significant difference in the overall quality of the dish. Here are some factors to consider:
- The size of the meat: The larger the meat, the longer it will take to cook, and the more likely it is to dry out. Basting can help prevent this.
- The structure of the meat: Certain cuts of meat, like a turkey, have unique shapes that can make it difficult for the meat to cook evenly. Basting can help ensure that the meat cooks properly.
- The recipe: Some recipes may call for basting as a necessary step to achieve the optimum flavor and texture.
- The chef’s preference: Some people simply prefer the taste and texture of meat that has been basted.
How to Properly Baste
If you do decide to baste your meat, here are some tips to keep in mind:
- Be careful not to overdo it: Too much basting can actually affect the cooking time and cause the meat to become soggy.
- Use a heavy, oven-safe pan: This will help distribute the heat evenly and prevent the pan from warping.
- Let the meat rest: Allow the meat to rest for a few minutes before slicing to allow the juices to redistribute.
- Use a good basting liquid: A mixture of melted butter, herbs, and spices or even apple cider can add a nice flavor to the meat.
- Stirring is key: Stirring the basting liquid occasionally will help ensure that the flavors are evenly spread.
Overall, whether or not to baste your meat is a personal preference. While it can improve the flavor and moisture of the meat, it’s not always necessary and can be skipped without affecting the end result.
Let Your Meat Rest: The Key to Perfectly Cooked Roasts and Steaks
When it comes to cooking meat, resting is just as important as cooking it. Resting allows the meat to relax and the juices to redistribute, resulting in a more flavorful and tender piece of meat. Here’s why:
- When meat is cooked, the heat causes the muscle fibers to contract and the juices to be pushed to the center of the meat.
- If you cut into the meat immediately after cooking, the juices will run out, leaving you with a dry and tough piece of meat.
- Resting allows the fibers to relax and the juices to redistribute throughout the meat, resulting in a more tender and flavorful piece of meat.
How to Rest Meat
Resting meat is a simple process, but it’s important to follow a few key steps to ensure that your meat is properly rested:
1. Remove the meat from the heat source: Whether you’ve grilled, roasted, or barbecued your meat, the first step is to remove it from the heat source.
2. Let it rest for the right amount of time: The amount of time you should let your meat rest depends on the type and cut of meat. Here are some general guidelines:
- Steaks and chops: Rest for 5-10 minutes
- Roasts: Rest for 15-30 minutes
- Large cuts of beef, pork, or lamb: Rest for 30-60 minutes
Note: The thicker the cut of meat, the longer it will take to rest.
3. Cover the meat: Covering the meat with foil or a lid will help to hold in the heat and keep the meat warm while it rests.
The Difference Resting Makes
Still not convinced that resting your meat is worth the extra time? Conduct a simple test:
- Cook two steaks to the same internal temperature.
- Let one steak rest for 5 minutes and immediately slice the other steak.
- Compare the two steaks and you’ll notice a big difference in the juices and tenderness of the rested steak.
Common Resting Mistakes
Resting meat may seem simple, but there are a few common mistakes that can ruin your dinner:
- Not allowing enough time to rest: If you don’t let your meat rest for the proper amount of time, the juices will not have had a chance to redistribute, resulting in a dry and tough piece of meat.
- Slicing the meat too thin: Slicing the meat too thin can cause the juices to run out, leaving you with a dry and tough piece of meat.
- Not properly heating the meat: If the internal temperature of the meat is too low, the juices will not have had a chance to redistribute, resulting in a dry and tough piece of meat.
- Not following the rule of half: The rule of half states that you should cook your meat for half the total cooking time and then let it rest for the other half. This applies to roasts and other larger cuts of meat.
Conclusion
So there you have it- the secret to perfect roasting is to preheat the oven, season the meat, and cook it at a high temperature for a short period of time.
You can use this method for almost any type of meat, and it’s a great way to cook vegetables too. So don’t be afraid to try it yourself!
Check out our new cookbook
Bitemybun's family recipes with complete meal planner and recipe guide.
Try it out for free with Kindle Unlimited:
Read for free
Joost Nusselder, the founder of Bite My Bun is a content marketer, dad and loves trying out new food with Japanese food at the heart of his passion, and together with his team he's been creating in-depth blog articles since 2016 to help loyal readers with recipes and cooking tips.